Your first comic
Twenty minutes, start to finish: a project, a character you drew, and a two-panel strip. You need ComicForge installed and a text editor. Nothing else — no Python file appears anywhere in this tutorial.
1. Scaffold a project
That lays out a complete, data-only project:
my-comic/
  characters/                 one directory per character
  scenes/                     one directory per scene background
  pixel/heart.yaml            a seed pixel-art sprite
  pages/hello.yaml            a page that already renders
  output/                     renders land here when you omit -o (gitignored)
  README.md  .gitignore
  .claude/skills/comicforge/  the authoring skill, so Claude can write specs
Render the starter page:
You get output/hello-<timestamp>.png — a bubble and a pixel heart on an A5
page. No characters yet, because ComicForge ships no art. That is the next step.
Omit -o while you iterate
Every render without -o lands in output/ with a timestamp, so successive
attempts pile up next to each other and you can see how the page evolved.
Pass -o path.png when you want a specific file.
2. Draw a character
A character is a directory of SVG files that all share one viewBox, plus a
manifest saying which files are variants of what. The base is the body; each
overlay is one variant of one slot, stacked on top.
characters/pip/
  base.svg           the body
  face-neutral.svg   slot "face", variant "neutral"
  face-happy.svg     slot "face", variant "happy"
  character.yaml     the manifest
Create that directory and paste in these four files. Note that all three SVGs
declare the same viewBox — that is what makes the overlays line up.
<svg xmlns="http://www.w3.org/2000/svg" viewBox="0 0 200 260">
  <g stroke="#21304a" stroke-width="6" stroke-linecap="round">
    <!-- legs -->
    <path d="M85 200v40M115 200v40" fill="none"/>
    <!-- body -->
    <rect x="62" y="118" width="76" height="86" rx="26" fill="#6aa9e0"/>
    <!-- arms -->
    <path d="M64 140l-26 30M136 140l26 30" fill="none"/>
    <!-- head -->
    <circle cx="100" cy="74" r="46" fill="#f6d3ad"/>
  </g>
</svg>
Check that the engine agrees with you about what you just drew:
{
  "pip": {
    "label": "Pip",
    "slots": {"face": ["neutral", "happy"]},
    "default": {"face": "neutral"}
  }
}
That JSON is the contract. Everything you can legally write in a spec — character names, slots, variant names — is in there. When a spec and this manifest disagree, the manifest wins.
Eyeball the drawing on its own, without building a page around it:
3. Write a page
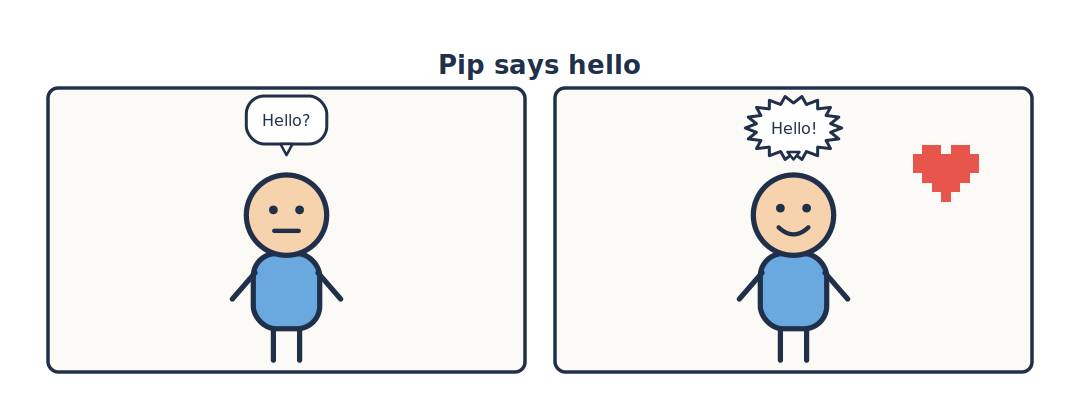
Create pages/first.yaml:
title: "Pip says hello"
page: [180, 70]              # a custom [width_mm, height_mm]
px_per_mm: 6
margin_mm: 8
gutter_mm: 5
library:   "../characters"
pixel_dir: "../pixel"

rows:
  - panels:
      - actors:  [{char: pip, face: neutral, x: 0.5, y: 0.62, scale: 0.8}]
        bubbles: [{text: "Hello?", kind: speech, speaker: pip}]

      - actors:  [{char: pip, face: happy, x: 0.5, y: 0.62, scale: 0.8}]
        bubbles: [{text: "Hello!", kind: shout, speaker: pip}]
        pixel:   [{art: heart, x: 0.82, y: 0.3, scale: 0.2}]
Three things are worth stopping on.
Paths resolve against the spec file. library: "../characters" works
because pages/first.yaml sits one level below characters/. Your current
working directory never matters.
x and y are fractions of the panel, not millimetres or pixels: 0 is
the left/top edge, 1 the right/bottom. scale is the actor's height as a
fraction of the panel height. So {x: 0.5, y: 0.62, scale: 0.8} means centred
horizontally, a little below the middle, eight tenths as tall as the panel.
speaker: pip does the bubble layout for you. The bubble is placed above
that actor and its tail aims at their head; you never write coordinates for it.
4. Check, then render
validate reads the spec against your actual art and lists every problem at
once — a character that does not exist, a variant you invented, a mistyped key.
It is worth running before every render, because render silently ignores keys
it does not recognise: write fcae: happy and you get a default face and no
complaint. validate catches it.
5. Iterate
Now change things and re-render. A few that pay off immediately:
- Swap
kind: speechforthoughtorshout. - Move an actor: nudge
xandy, or setflip: trueto turn them around. - Add
caption: "Later that day."to a panel — a narration band appears under the art, inside the frame. - Add a second row under the first, or a third panel with
width: 2to make it wider than its neighbours. - Turn the outlines off with a page-level
frame: {width: 0}.
Rendering the whole page every time gets slow once it is full. To look at one panel, ask for one panel:
Output format follows the extension, so when the strip is finished:
cmf render pages/first.yaml -o first.pdf   # true vector, crisp at print size
cmf render pages/first.yaml -o first.svg   # one self-contained file
Where to go from here
-
Core concepts — the model underneath: identities, poses, slots, and why placement is fractional.
-
Pages, rows and panels — page sizes, row weights, panel widths, and how the grid is computed.
-
Bubbles — stacking, corner anchors, tails, and page-wide lettering.
-
Making the art — multiple poses, shared expressions, anchors, and how to add a scene.